


Introduction
Building forms in React is exciting when you get the hang of it. However, when you're first learning React as a beginner, it can be one of the complex topics to navigate. No worries. With diligent study and practice, it is possible to even come to a point where you actually enjoy creating those forms.
Once you have a good understanding of how forms work in React and how to build them, there are a number of form libraries available for you to explore. These libraries often take away much of the complexities. Thus, making the process of building forms in React a fairly straightforward one.
Nonetheless, if you're a beginner, learning how things work in plain React will make picking up a form library an even easier task for you. You'll also get the added advantage of knowing how the form library you choose to use works under the hood. We'll discuss a few of these form libraries later in the article.
Prerequisites
Before we move on to start building our form, let me point out some assumptions that this article makes. There are some topics that I'll assume you've got some knowledge. You've probably covered them already so it might not be a big deal. However, let me point them out.
You should at least have working knowledge on the following;
- JSX
- Components
- State
What we are going to build
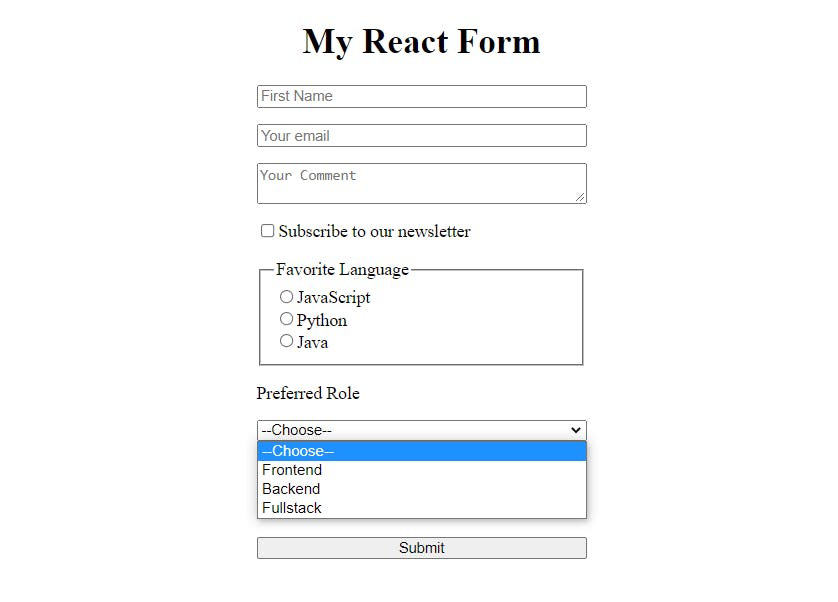
Time for building some forms. In this tutorial, we will be building the form in the image below using React. I've kept the styling plain and simple so we can keep our focus on the task at hand - building a form in React.
You can build this form in an existing react app or you can create a new one by running the command npx create-react-app my-app in your terminal. This command will get you a boilerplate you can use.
Alright, enough talk. Let the action begin.
First things first. Let's us put up our structure for the form using JSX syntax. This will look similar to a regular html form.
function Form() {

  return (
    <div>
      <h1>My React Form</h1>

      <form>
        <input
          type='text'
          placeholder='First Name'
        />
        <input
          type='email'
          placeholder='Your email'
        />
        <textarea
          placeholder='Your Comment'
        />
        <label htmlFor='subscribe'>
          <input
            type='checkbox'
            id='subscribe'
          />
          Subscribe to our newsletter
        </label>

        <fieldset>
          <legend>Favorite Language</legend>

          <input
            type='radio'
            id='javascript'
          />
          <label htmlFor='javascript'>JavaScript</label>
          <br />

          <input
            type='radio'
            id='python'
          />
          <label htmlFor='python'>Python</label>
          <br />

          <input
            type='radio'
            id='java'
          />
          <label htmlFor='java'>Java</label>
          <br />
        </fieldset>

        <label htmlFor='preferredRole'>Preferred Role</label>
        <select
          id='preferredRole'
        >
          <option value=''>--Choose--</option>
          <option value='frontend'>Frontend</option>
          <option value='backend'>Backend</option>
          <option value='fullstack'>Fullstack</option>
        </select>

      </form>
    </div>
  )
}
In the code snippet above, we have a functional component named Form. Inside this component, we have an h1 element. And then there's the form tag <form> </form>.
The form tag contains all of our form elements. Below is a list of all them
- An input element (with type of text).
- An input element (with type of email).
- A textarea element.
- An input element (with type of checkbox).
- 3 input elements (with type of radio).
- A select element with options.
Before we proceed, here's the CSS if you want to add it. Its just 11 lines. Like I mentioned earlier. We're keeping the style simple so we don't get distracted by it.
h1 {
  text-align: center;
}

form {
  display: flex;
  flex-direction: column;
  gap: 15px;
  width: 300px;
  margin: 0 auto;
}
Using State
We need a way to get all the data a user will provide when filling the form. We can use that with the React useState hook. First, we have to import useState from React.
import { useState } from 'react'
The next thing is to initialize state value. We can initialize separate state values for each of our form elements. However, to keep things nice and clean, we can use an object as our initial state value. This object will contain properties that corresponds the various form elements.
Note: The state value has to be defined within the functional component and before the return keyword.
const [formData, setFormData] = useState(
    {
        firstName: "",
        email: "",
        comment: "",
        isSubscribed: false,
        favLanguage: "",
        preferredRole: ""
    }
)
Note: the initial value of the corresponding property for the checkbox isSubscribed is a boolean value. This is because unlike the others, checkboxes can only be checked or unchecked, hence the use of boolean (false when unchecked and true when checked).
Next up, we need to give each of our element a name property. This name property should be the same as the name of the property in formData (which is the state).
import { useState } from 'react'

export default function Form() {
  const [formData, setFormData] = useState(
    {
      firstName: "",
      email: "",
      comment: "",
      isSubscribed: false,
      favLanguage: "",
      preferredRole: ""
    }
  )

  return (
    <div>
      <h1>My React Form</h1>

      <form>
        <input
          type='text'
          placeholder='First Name'
          name='firstName'
        />
        <input
          type='email'
          placeholder='Your email'
          name='email'
        />
        <textarea
          placeholder='Your Comment'
          name='comment'
        />
        <label htmlFor='subscribe'>
          <input
            type='checkbox'
            id='subscribe'
            name='isSubscribed'
          />
          Subscribe to our newsletter
        </label>

        <fieldset>
          <legend>Favorite Language</legend>

          <input
            type='radio'
            id='javascript'
            name='favLanguage'
          />
          <label htmlFor='javascript'>JavaScript</label>
          <br />

          <input
            type='radio'
            id='python'
            name='favLanguage'
          />
          <label htmlFor='python'>Python</label>
          <br />

          <input
            type='radio'
            id='java'
            name='favLanguage'
          />
          <label htmlFor='java'>Java</label>
          <br />
        </fieldset>

        <label htmlFor='preferredRole'>Preferred Role</label>
        <select
          id='preferredRole'
          name='preferredRole'
        >
          <option value=''>--Choose--</option>
          <option value='frontend'>Frontend</option>
          <option value='backend'>Backend</option>
          <option value='fullstack'>Fullstack</option>
        </select>

      </form>
    </div>
  )
}
Updating State
Anytime a user providing some data or filling our form, we want to be able to update the state value. That way, whenever the user hits submit, the data will be ready for submission.
To do that, we need to add an event listener onChange to each of the form elements. The value of the event listener should be a function that updates the state.
Let's create the function. We can call it handleFormChange.
  function handleFormChange (event) {
    const { name, value, type, checked } = event.target
    setFormData(prevFormData => {
      return {
        ...prevFormData,
        [name]: type === "checked" ? checked : value
      }
    })
  }
Before we add an onChange event listener to our form elements, let's explain what the handleFormChange function is doing.
The function takes a parameter event. This is an object that React provides under the hood when the even listener is triggered. The details of this object is beyond the scope of this article. Just keep in mind that this event object has a property called target and that all that we need.
We can destructure event.target to get the following which will be useful for updating the state name, value, type and checked.
To update the state, we need to use the setter function. In this case setFormData. And then we can pass to the setter function a callback function that takes the previous formData as argument. It should then return an object since our state value is an object.
This new object to be returned should contain all the data from the previous formData ...prevFormData.
And then, to know the property in the State whose value is to be updated, we should check the type of form input or element. If it is a checkbox, then we use checked. Otherwise, we'll use value.
I know this can be a lot to take in at first. If you've struggled to follow along up to this point, I would encourage you to read through it again before proceeding.
Now we can go ahead and add an onChange event listener to our form elements. The value of the event listener is going to be the handleFormChange function we've created.
import { useState } from 'react'

export default function Form() {
  const [formData, setFormData] = useState(
    {
      firstName: "",
      email: "",
      comment: "",
      isSubscribed: false,
      favLanguage: "",
      preferredRole: ""
    }
  )

  function handleFormChange (event) {
    console.log(event)
    const { name, value, type, checked } = event.target
    setFormData(prevFormData => {
      return {
        ...prevFormData,
        [name]: type === "checked" ? checked : value
      }
    })
  }

  return (
    <div>
      <h1>My React Form</h1>

      <form>
        <input
          type='text'
          placeholder='First Name'
          name='firstName'
          onChange={handleFormChange}
        />
        <input
          type='email'
          placeholder='Your email'
          name='email'
          onChange={handleFormChange}
        />
        <textarea
          placeholder='Your Comment'
          name='comment'
          onChange={handleFormChange}
        />
        <label htmlFor='subscribe'>
          <input
            type='checkbox'
            id='subscribe'
            name='isSubscribed'
            onChange={handleFormChange}
          />
          Subscribe to our newsletter
        </label>

        <fieldset>
          <legend>Favorite Language</legend>

          <input
            type='radio'
            id='javascript'
            name='favLanguage'
            onChange={handleFormChange}
          />
          <label htmlFor='javascript'>JavaScript</label>
          <br />

          <input
            type='radio'
            id='python'
            name='favLanguage'
            onChange={handleFormChange}
          />
          <label htmlFor='python'>Python</label>
          <br />

          <input
            type='radio'
            id='java'
            name='favLanguage'
            onChange={handleFormChange}
          />
          <label htmlFor='java'>Java</label>
          <br />
        </fieldset>

        <label htmlFor='preferredRole'>Preferred Role</label>
        <select
          id='preferredRole'
          name='preferredRole'
          onChange={handleFormChange}
        >
          <option value=''>--Choose--</option>
          <option value='frontend'>Frontend</option>
          <option value='backend'>Backend</option>
          <option value='fullstack'>Fullstack</option>
        </select>

      </form>
    </div>
  )
}
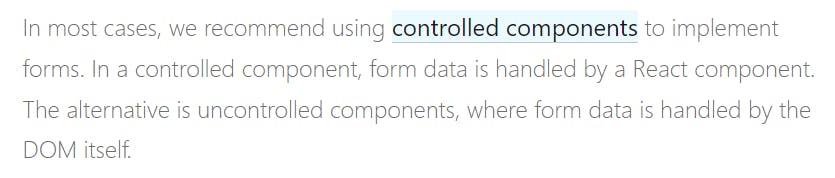
Controlled Components
There are diverse opinions on whether or not controlled components are the way to go. Here's what the React Official Docs has to say on the matter.
To use controlled components, we have to give our elements a value property. And the value of that property should be the value of the corresponding property in state.
import { useState } from 'react'

export default function Form() {
  const [formData, setFormData] = useState(
    {
      firstName: "",
      email: "",
      comment: "",
      isSubscribed: false,
      favLanguage: "",
      preferredRole: ""
    }
  )

  function handleFormChange (event) {
    console.log(event)
    const { name, value, type, checked } = event.target
    setFormData(prevFormData => {
      return {
        ...prevFormData,
        [name]: type === "checkbox" ? checked : value
      }
    })
  }

  return (
    <div>
      <h1>My React Form</h1>

      <form>
        <input
          type='text'
          placeholder='First Name'
          name='firstName'
          onChange={handleFormChange}
          value={formData.firstName}
        />
        <input
          type='email'
          placeholder='Your email'
          name='email'
          onChange={handleFormChange}
          value={formData.email}
        />
        <textarea
          placeholder='Your Comment'
          name='comment'
          onChange={handleFormChange}
          value={formData.comment}
        />
        <label htmlFor='subscribe'>
          <input
            type='checkbox'
            id='subscribe'
            name='isSubscribed'
            onChange={handleFormChange}
            checked={formData.isSubscribed}
          />
          Subscribe to our newsletter
        </label>

        <fieldset>
          <legend>Favorite Language</legend>

          <input
            type='radio'
            id='javascript'
            name='favLanguage'
            onChange={handleFormChange}
            value='javascript'
            checked={formData.favLanguage === 'javascript'}
          />
          <label htmlFor='javascript'>JavaScript</label>
          <br />

          <input
            type='radio'
            id='python'
            name='favLanguage'
            onChange={handleFormChange}
            value='python'
            checked={formData.favLanguage === 'python'}
          />
          <label htmlFor='python'>Python</label>
          <br />

          <input
            type='radio'
            id='java'
            name='favLanguage'
            onChange={handleFormChange}
            value='java'
            checked={formData.favLanguage === 'java'}
          />
          <label htmlFor='java'>Java</label>
          <br />
        </fieldset>

        <label htmlFor='preferredRole'>Preferred Role</label>
        <select
          id='preferredRole'
          name='preferredRole'
          onChange={handleFormChange}
          value={formData.preferredRole}
        >
          <option value=''>--Choose--</option>
          <option value='frontend'>Frontend</option>
          <option value='backend'>Backend</option>
          <option value='fullstack'>Fullstack</option>
        </select>

      </form>
    </div>
  )
}
A note on Checkboxes
As we noted earlier, checkboxes are unique. We did not pass a value property to our checkbox. Instead, we passed it a checked property and value of this checked property is the value of the corresponding property in state, in this case formData.isSubscribed which is a boolean.
A note on Radio buttons
Radio buttons are also unique in their own way. They are like a combination of both the checkbox and text inputs. Note how they each have a value property whose value is the same as the value of the id property. This is to ensure that each radio button has its own unique value.
However, only one radio button can be clicked at a time. Thus, to ensure that this is the case, all three radio buttons have the same name property with the same value.
Finally, to ensure the checked property of the radio button is a boolean, we compare the value of each button to the value of the corresponding state property. If it is true, then that particular radio button will be checked. Otherwise, it will be unchecked.
Submitting form data
To submit form data, we simply need a <button> tag inside the <form> tag. In React, any button inside a form will be treated as a submit button. We also need to add an onSubmit event listener to the <form>. Any time the button inside the form is clicked, the onSubmit event listener will be triggered. The value of the onSubmit event listener should be a function that submits the data to some database.
For the purpose of this tutorial, we'll simply log the data we've collected in the console just to make sure we were able to successfully collect the data. So we will have something like this.
function handleFormSubmit(e) {
    e.preventDefault()
    console.log(formData)
}


<form onSubmit={handleFormSubmit}>
    ...
    <button>Submit</button>
</form>
Note: The preventDefault() method is used to prevent the browser from executing the default action of the selected element and refreshing the page.
The code for our React form should finally look this.
import { useState } from 'react'

export default function Form() {
  const [formData, setFormData] = useState(
    {
      firstName: "",
      email: "",
      comment: "",
      isSubscribed: false,
      favLanguage: "",
      preferredRole: ""
    }
  )

  function handleFormChange (event) {
    const { name, value, type, checked } = event.target
    setFormData(prevFormData => {
      return {
        ...prevFormData,
        [name]: type === "checked" ? checked : value
      }
    })
  }

  function handleFormSubmit(e) {
    e.preventDefault()
    console.log(formData)
  }

  return (
    <div>
      <h1>My React Form</h1>

      <form onSubmit={handleFormSubmit}>
        <input
          type='text'
          placeholder='First Name'
          name='firstName'
          onChange={handleFormChange}
          value={formData.firstName}
        />
        <input
          type='email'
          placeholder='Your email'
          name='email'
          onChange={handleFormChange}
          value={formData.email}
        />
        <textarea
          placeholder='Your Comment'
          name='comment'
          onChange={handleFormChange}
          value={formData.comment}
        />
        <label htmlFor='subscribe'>
          <input
            type='checkbox'
            id='subscribe'
            name='isSubscribed'
            onChange={handleFormChange}
            checked={formData.isSubscribed}
          />
          Subscribe to our newsletter
        </label>

        <fieldset>
          <legend>Favorite Language</legend>

          <input
            type='radio'
            id='javascript'
            name='favLanguage'
            onChange={handleFormChange}
            value='javascript'
            checked={formData.favLanguage === 'javascript'}
          />
          <label htmlFor='javascript'>JavaScript</label>
          <br />

          <input
            type='radio'
            id='python'
            name='favLanguage'
            onChange={handleFormChange}
            value='python'
            checked={formData.favLanguage === 'python'}
          />
          <label htmlFor='python'>Python</label>
          <br />

          <input
            type='radio'
            id='java'
            name='favLanguage'
            onChange={handleFormChange}
            value='java'
            checked={formData.favLanguage === 'java'}
          />
          <label htmlFor='java'>Java</label>
          <br />
        </fieldset>

        <label htmlFor='preferredRole'>Preferred Role</label>
        <select
          id='preferredRole'
          name='preferredRole'
          onChange={handleFormChange}
          value={formData.preferredRole}
        >
          <option value=''>--Choose--</option>
          <option value='frontend'>Frontend</option>
          <option value='backend'>Backend</option>
          <option value='fullstack'>Fullstack</option>
        </select>
        <button>Submit</button>
      </form>
    </div>
  )
}
Building forms using libraries
As mentioned earlier, there are some React form libraries out there that simplifies the process of creating a form in React. Thus, enabling you to build forms faster and with less code.
If you’re looking for a complete solution including validation, keeping track of the visited fields, and handling form submission, Formik is one of the popular choices. However, it is built on the same principles of controlled components and managing state — so don’t neglect to learn them.
React Docs
Conclusion
I hope you were able to follow along with this article and have found it useful. Forms is one of the difficult topics to learn in React. Almost every website or app makes use of forms in one way or another. Thus, if you are able to go through the initial difficulty and master it, it would be a valuable skill to possess.